We recommend using the Universal Print Connector if you have printers that are not web enabled and you want to be able to print directly from Business Central to the printer. This is useful if you for example want to use older existing label printers for printing labels directly from Business Central (as an example of a use case).
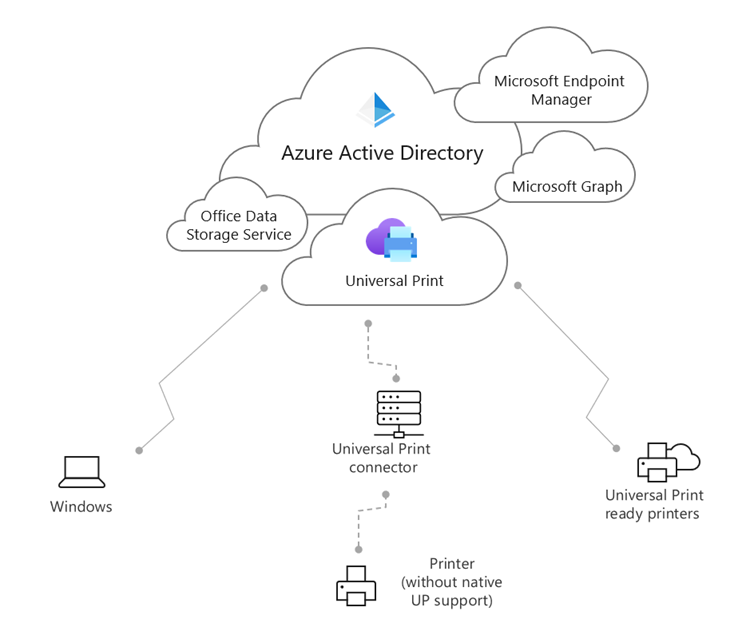
The Universal Print connector is a component that you can use to make a printer work with Universal Print. Unless you have a printer that directly connects to Universal Print, you must use a connector. For a printer to communicate directly with Universal Print, the printer firmware needs to support the communication protocols that the Universal Print service uses. Various printer manufacturers plan to offer Universal Print–compatible printers.
Below shows the Universal Print Connector linking the printer with the Universal Print cloud service in Azure Active Directory where Business Central can print to.
Below is an overview of how to install and configure the Universal Print Connector to work with Business Central.
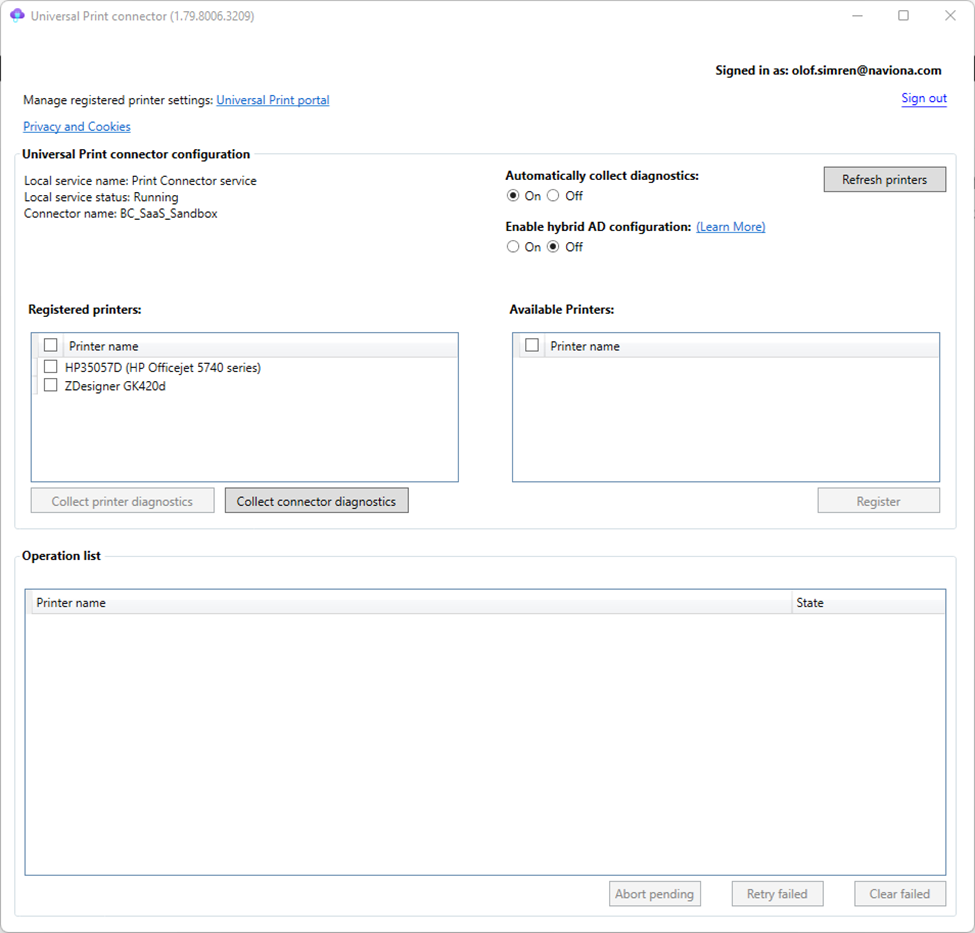
The fist step is to install the Universal Print Connector on the machine that accesses the printers. Once that’s done you register the printers that should be used to print to. In this case we have registered an HP printer and a Zebra label printer.
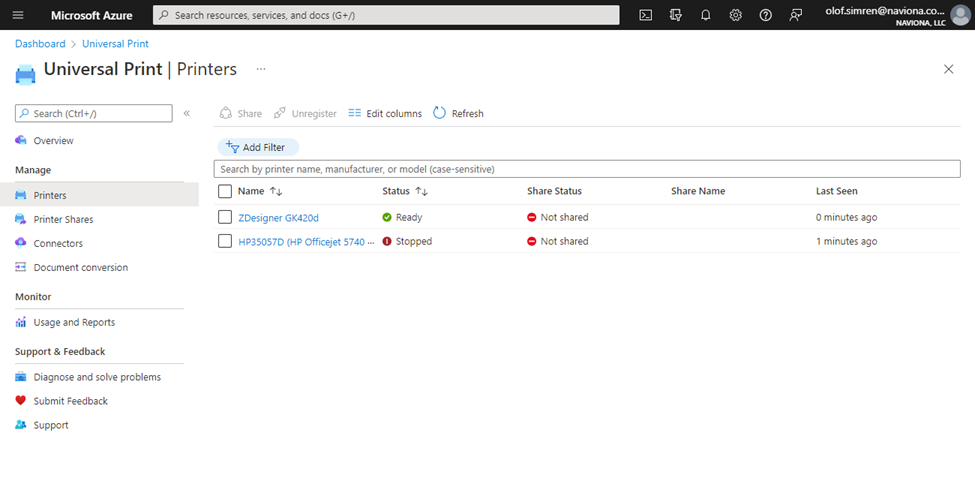
Next go to your Universal Print subscription in Microsoft Azure. This should now show the printers registered in the connector.
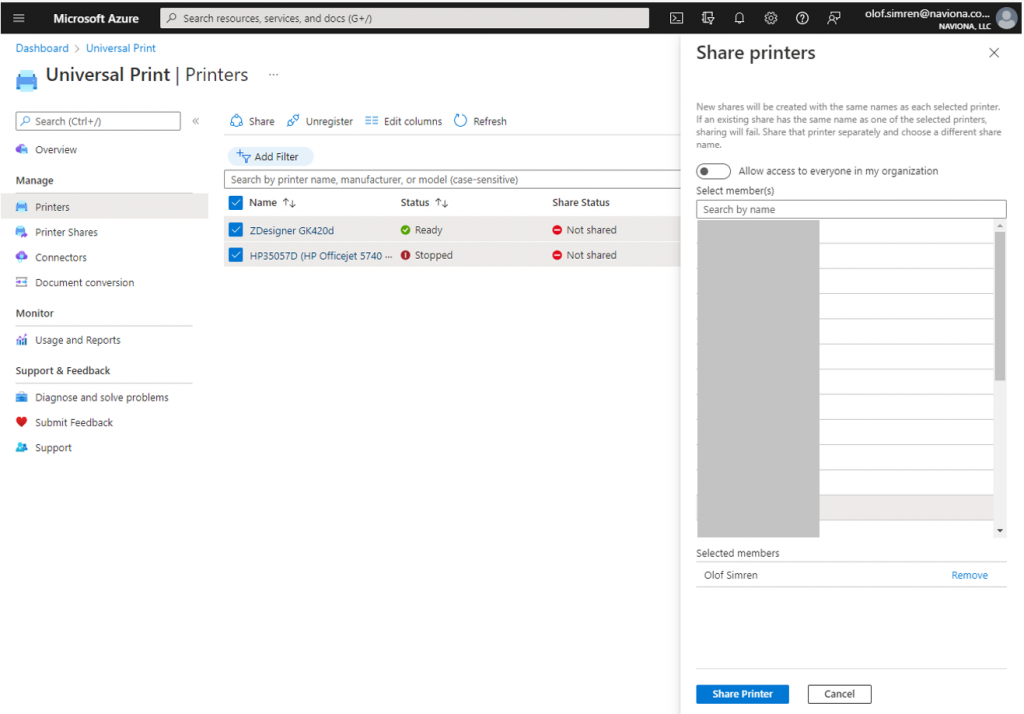
You can for each printer share it with any of the users in your Azure Active Directory.
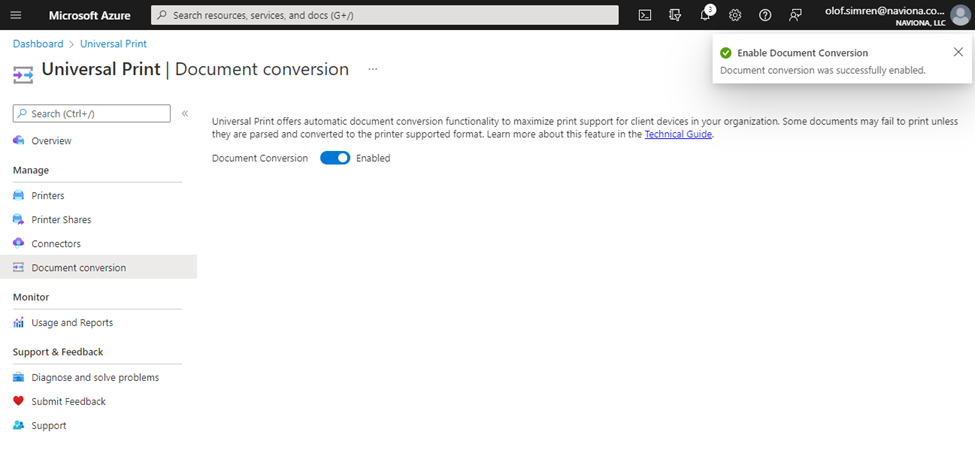
Then we recommend turning on Document Conversion like below.
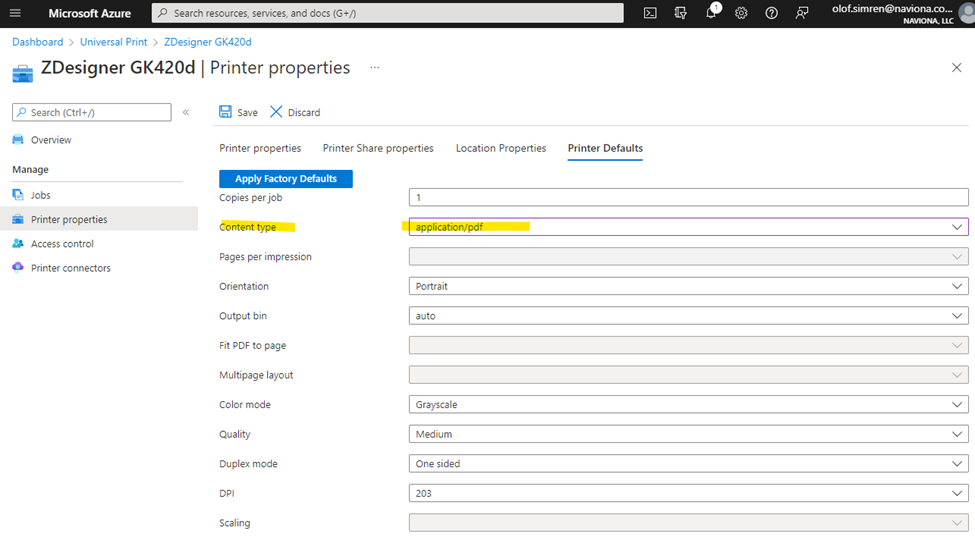
And to set the Content type to application/pdf.
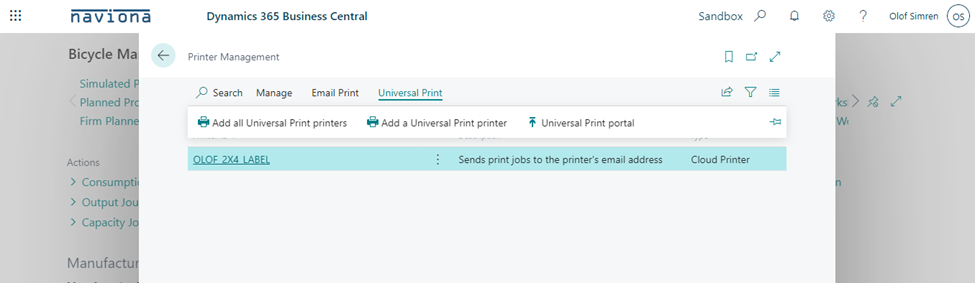
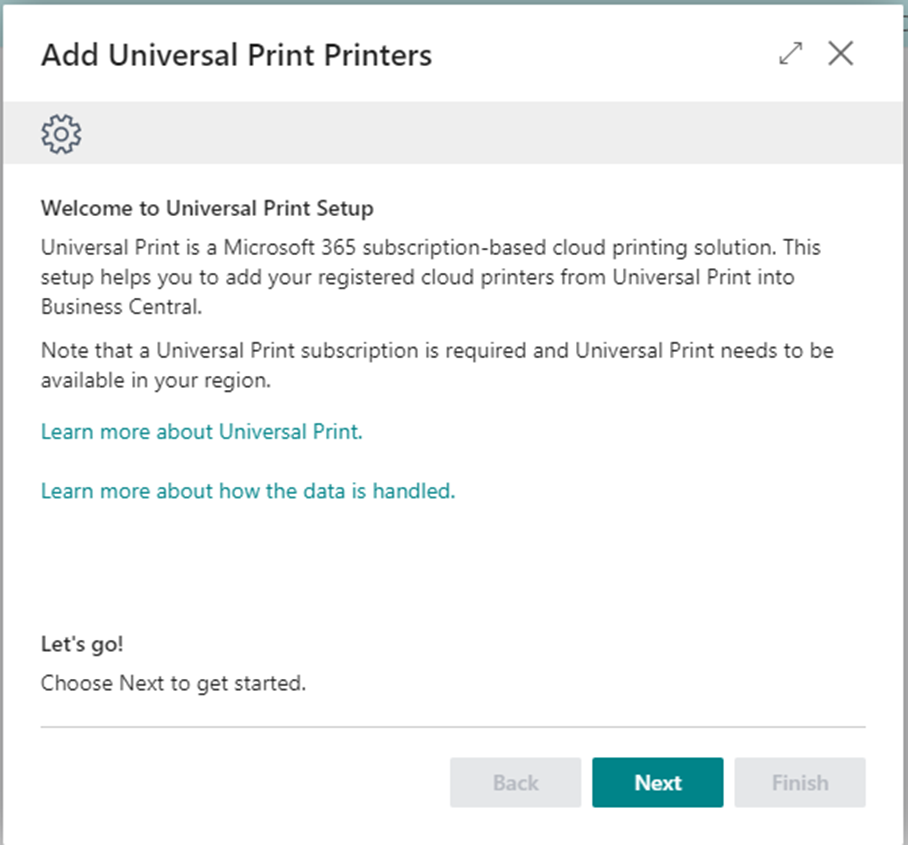
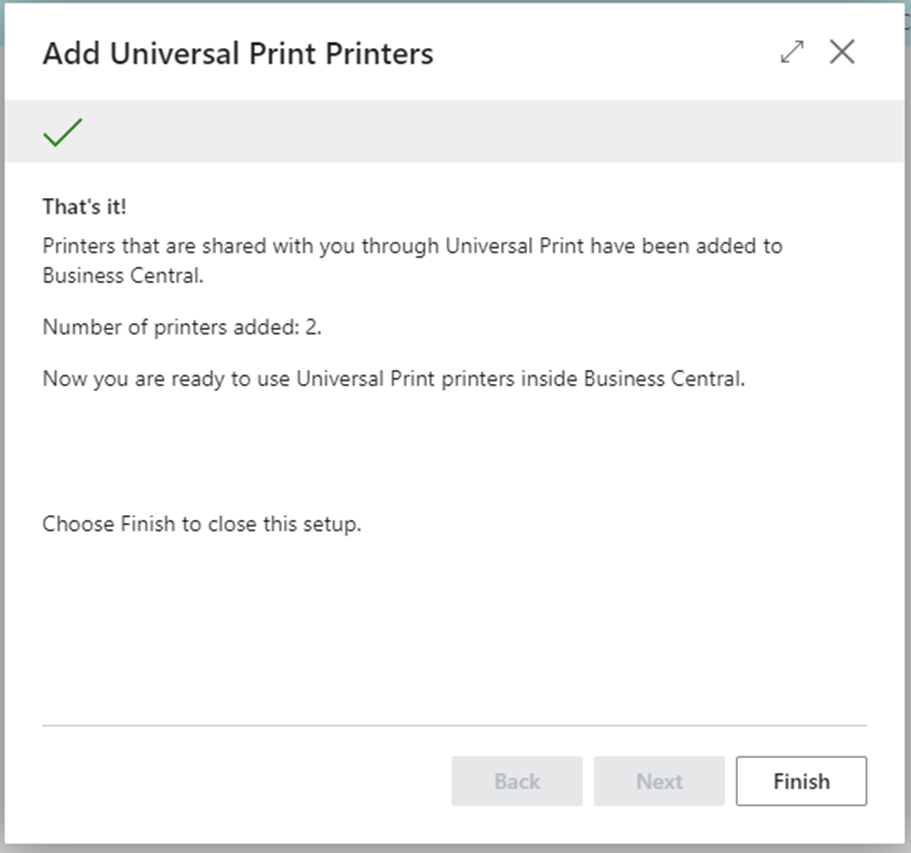
In Business Central you install the Universal Print extension and from the Printer Management menu you can then add the printers using a wizard.
Wizard step 1.
Wizard step 2.
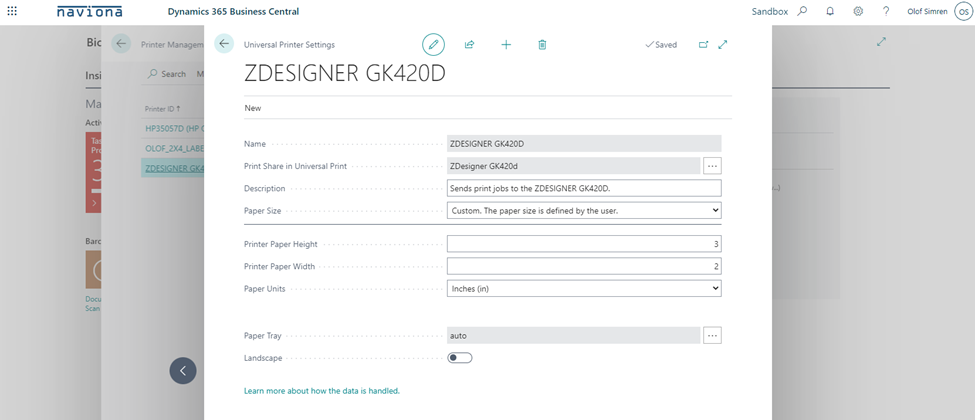
The printers added looks like below in our case.
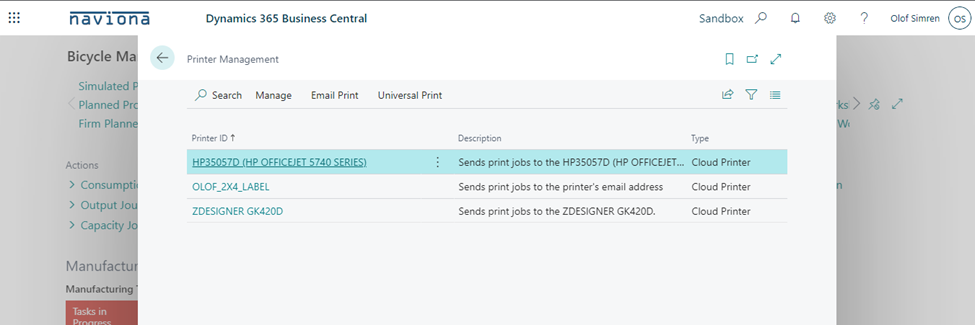
And for each of them you can set the paper size in Business Central to match the labels or papers printed on. Then you have printers that are ready to be used with Business Central and solutions like out label printing solution can print to label printers without displaying any print dialogs etc..